
Modern houses are supplied with water through a complex pumping system. The pressure in it can reach enormous values and if the pressure is too high, the system can deform.
To prevent such cases, there is a special device - the pressure switch of the pumping station.
1 Purpose
A pressure switch is a special device that controls a number of parameters in the system. It is triggered after reaching the upper head level, after which the pump is turned off. The main working mechanism is a movable spring group.
Also, the device helps to regulate the pressure level, decrease or increase it. More advanced and expensive models have additional functions, such as: different kinds descent, connectors for connecting an additional pump, various indicators, its own pressure gauge, temperature control.
1.1 How it works
A force acts on the spring group, the main part. If the pressure is too high, the spring is pulled out and touches the electrical contact.
This contact is connected to a sensor that, when triggered, gives a signal to stop the pump. The spring tension is adjusted with special nuts that help to set the upper and lower compression limits.
2 Scope of application
Now there are several types of such devices:
- water pressure switch for the pumping system;
- air pressure switch for the compressor;
- charging voltage relay for devices.
According to the principle of operation, the first two devices are exactly the same.
The first device is also called a water flow apparatus. The first type controls the compression of the water in the pumping system, thereby protecting it from excessive pressure. In such systems, it is connected to a hydraulic accumulator. A hydroaccumulator is a special container where the pump pumps water, which then enters the water system under pressure. It is important to install the device close to the accumulator for more correct and accurate operation. Without this component, the autonomous operation of the pumping station is impossible.
The relay for the air pump acts in a similar way, but it is connected to the compressor. Air pumps are powerful, and if not controlled, the system can burst from the inside. In such a system, it is installed closer to the pump for better performance.
3 Installation in a water system
An improperly installed device does not turn on or off the pump. It is installed in front of the accumulator. This increases the accuracy of its work. To begin with, the device is connected to a pumping system, after which it is put into action. You need to connect tightly so that the setting is more accurate.
4 Installation instructions
You need to do the following:

5 Adjusting the water flow
Since water systems are popular in everyday life, it is important to know how to set up a water pressure switch. This will help to effectively use the resources of the pumping system, as well as keep it in working order for a long time. Below is how to adjust the water pressure switch with your own hands.
The device has 2 main restraints: one for the upper and one for the lower pressure. The lower one is the indicator at which the pump turns on. Upper - at which it turns off. These two indicators are adjusted using special nuts on the device body. screw bigger size responsible for the top, the smaller - for the bottom.
At purchase it has standard settings, where the top is set at around 2.5 atmospheres, and the bottom is set at 1.5 atmospheres. However, these values can be changed by adjusting to the individual characteristics of the pumping station with your own hands, because the factory-set switch is not always suitable for the needs of the consumer.
By adjusting the device, it is necessary to create air pressure in the accumulator of the pumping system. You can use a car pump for this. After the necessary parameters have been created, you can start setting up the water flow switch with your own hands.

When setting up a water level switch with your own hands, you need to remember the following points:
- to increase the pressure, the nuts must be rotated clockwise, to decrease - counterclockwise;
- the accumulator may burst if the pressure is too high. Do not exceed the upper pressure limit. This value can be found on the packaging of the accumulator;
- hoses and taps also have their own pressure limits;
- the settings should be based on the capabilities of the pump. The pump simply may not be up to its task;
- if the interval between high and low compression levels is large, then the accumulator will contain a lot of water, and the pump will turn on a little. However, this option will create drops in the water pressure;
- in the opposite situation, when the difference between high and low compression is small, the head will be constant. However, the pump will run continuously.
With proper tuning, the device will provide the entire system with a constant and uninterrupted water pressure, save pump electricity. Correct setting ensures long service life of the device.
5.1 How to set up a pressure switch? (video)
6 Malfunctions
During operation, the most common problems can be corrected by hand. These are problems from the category: "the pump does not turn on or off", "does not work", "does not turn off, turn off", etc. Below is a description of these problems and how to solve them. If the device is not configured correctly, it may not work.
6.1 Problem: when the upper mark is reached, the pump does not turn off
There can be many reasons why the device does not turn off the pump. The main ones are:
- Incorrect setting of the upper pressure regulator.
- Malfunction of the upper adjuster spring.
- Unstable voltage in the network.
- Depressurization of the accumulator.
- Breakdown of the electronic system.
In the first two cases, it is possible to repair the malfunction with your own hands; in the latter, you need to hand the device into the hands of a specialist or make a replacement.

If the upper pressure regulator is incorrectly set, when it is set too high pressure, the pump will run continuously. To correct this problem, you need to reconfigure the machine.
The spring may break and the high pressure will not stretch it, and therefore the contacts will not close. Also, the mechanism connecting the nut and spring may break. Fortunately, the spring has a simple structure, unlike the electronic filling of the device, and it will not be difficult to replace it. Components can be purchased at hardware stores.
Since it is an electronic device, voltage fluctuations affect it. They can cause arbitrary switching on and off of the pumping system. If a breakdown is suspected, check the voltage stability.
Depressurization of the accumulator leads to a loss of pressure in the system. The device does not turn off the pump and it continues to pump water. To prevent this situation, carefully monitor the sealing of the pumping system.
The filling of the relay is a rather complex device that is designed to turn off the pump. If it breaks down, self-repair is impossible. In this case, the master must configure the relay. Replacement too a good option, the relay is not very expensive. If you decide to replace the installed relay, pay attention to the RDM 5 pressure switch, whose cost does not exceed 1000 rubles. A cheaper option is the PM 5 pressure switch.
6.2 Problem: the relay turns off the pump even when the pressure has not reached the highest level
The reasons and solutions for this problem are the same as for the previous one.
6.3 Problem: something constantly clicks in the water flow switch
There are only two reasons for this malfunction: there is not enough air pressure in the hydraulic tank or the membrane is torn.
If there is no pressure in the accumulator, you need to re-inject air there, then adjust the relay, as described above.
The membrane is installed in front of the hole where the water from the system enters. When it breaks through, the pressure of the water forces it to beat against the pipe walls, thereby making a clicking sound. It can be easily replaced by disassembling the device. After replacement, you need to configure the pumping station relay with your own hands. How to adjust the pressure switch is described above.

- carefully monitor the sealing of the water system;
- competent setting will ensure a constant water pressure and energy savings;
- you need to check the compression in the accumulator at least once every six months;
- use an accurate pressure gauge to set the pressure;
- Do not pump over the accumulator. The maximum pressure for him is written in the instructions;
- watch out for the insulation of electrical contacts, as they are near water;
- if you are not sure that you can adjust the pressure switch yourself, use the services of a professional. This will save you time and money.
8 DIY relays
If there is a need to make a water flow switch with your own hands, then it makes sense to use a flow switch from a gas column for this purpose. The stem must press the micro switch that turns on the pump. But in order for the system to work for a long time and meet safety requirements, it is still better to purchase the device in a specialized store.
The water pump relay is a device that controls the pressure level and provides autonomous operation in the water system. That is why, with its proper operation, the service life is significantly increased.
Setting up a pump station pressure switch with your own hands is an important procedure. The correct setting ensures a stable water pressure and saves electricity, which is consumed to power the pump.
If there is a faulty contact, the device should be replaced. Most of the common faults can be corrected by hand without contacting a technician. Repair of the pump station pressure switch is easy at home.
We will send the material to you by e-mail
The proper engineering system will perform its functions flawlessly if the water regulation for the pump is correct. This procedure can be performed independently without seeking help from specialists. It will increase the accuracy of the equipment and prevent premature failure of its individual components.
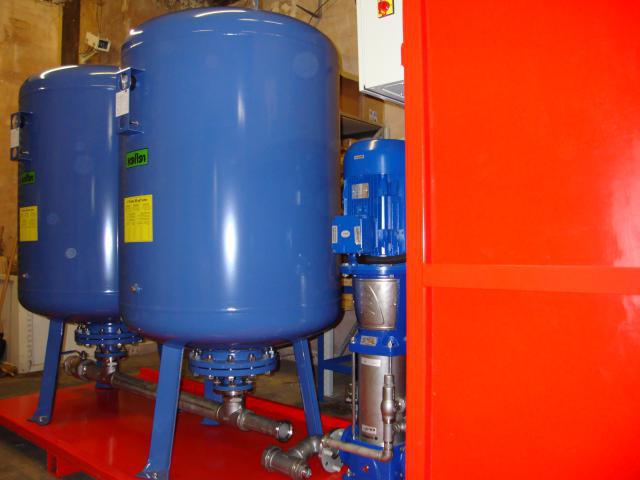
The relay indicated by the arrow is installed in individual water supply systems
Automatic memorization of the algorithm for certain actions is useful only in standard situations. In practice, various malfunctions occur, so in-depth knowledge is required. They will also be useful in order to buy a new pressure switch for the pump without annoying mistakes and unnecessary expenses.
What is the exact setting of the pressure switch of the pumping station for?
- At low pressure, the water from the taps flows too slowly. Some models of dishwashers do not turn on or malfunction.
- An excessively high head exerts excessive loads on all elements of the water supply system. The likelihood of emergencies increases.
- Inaccurate adjustment of the water pressure switch for the pump causes it to operate very often. This will prematurely wear out the mechanical parts of the device.

It functions as follows:
- Wells "on the sand", wells and other typical sources do not themselves create pressure in the water supply system. To solve this problem, at the first stage, a pump is used (10).
- When turned on, it supplies liquid to a special tank (15). It has a flexible partition. This capacity is a storage and a damper at the same time.
- After reaching the maximum pressure (3.3 atm.), The contact groups of the relay (1) open, the pump motor is turned off.
- From this point on, the pressure in the system is maintained only by the tank.
- In the process of work and other consumers, the pressure drops. When it decreases to 2, 2 atm. The relay contacts will close the 220V electric circuit and turn on the pump.
These cycles are repeated automatically, without user intervention.
Note! The pressure levels are working, but approximate. In order to accurately regulate the water pressure switch for the pump, it is necessary to use the appropriate data for the specific station.
Parameters of products from different manufacturers
The following table shows the data of specialized control relays for water stations.
Table 1. Data of specialized control relays for water stations.
| Image | Model | Pressure range, atm. | Cost, rub. | Peculiarities |
|---|---|---|---|---|
 | Genebre 3780 (Spain) | Up to 4 | 350-400 | Manufacturer's warranty for 1 year. |
 | Italtecnica PM / 5 | 1-5 | 470-490 | |
 | UNIPUMP PM / 5 | 1-4,5 | 460 | Analogue of Italtecnica, co-production Italy - Russia. |
 | Italtecnica PM53W | 1-5 | 950 | Built-in pressure gauge, 5 fittings, reinforcement of threaded connections with metal inserts. |
 | Italtecnica PMR / 5 | 1-5 | 795 – 820 | Button for manual start on the body, water temperature - up to + 110 ° C. |
 | Danfoss KPI 35 (Poland) | 0,2-8 | 3 100 – 3 500 | Industrial grade relay with IP44 protection. |
 | Tival FF4 (Germany) | 0,2-8 | 5 100 – 5 300 | Silumin transparent body for easy visual inspection. |

The principles of operation of the above products are the same. The mechanism in the figure provides a relatively low information content. It is more accurate and easier to set pressure using a specialized device, a manometer.
The price of electronic water pressure switches for the pump is higher. These devices should be considered separately as they differ significantly from the models presented in this article. Their equipment includes: micro-turbines for measuring the fluid flow rate, special pressure sensors and data transmission units to external display devices.

Method of adjusting the water pressure switch for the pump
This algorithm is used in an "ideal" situation when the water supply system is in good working order.

The following steps will help you set up a new regulator:
- Disconnect the pump from the 220 V network and drain the water completely.
- The engine is powered and the pressure rise is monitored on the pressure gauge and the level is recorded automatic shutdown... Open the valve so that the pressure drops slowly. The readings of the device are recorded, at which the relay contacts are closed.

A small spring does not set a certain pressure to turn off, but the difference between the values \ u200b \ u200bof turning on and off the pump
Diagnostics, post-setup troubleshooting and upgrades
If the above scheme does not work, loosen both nuts with a preliminary increase in pressure, for example, to 3.3 atm. Slowly drain the liquid to the required level (2, 3 atm.), Close the valve. A nut on a large spring is clamped to a position until the relay turns off. After - repeat the steps from the previous section.
Standard regulators (type Italtecnica PM / 5) can be upgraded:
- The third spring, created in the shape of a pin, is bent in such a way that the fixation in the plastic stops is more secure.
- The neutral conductor is connected directly to the motor. The phase wire is divided into two groups, which reduces wear during the burning of the contacts.

General conclusions
With these instructions self-adjustment a water pressure switch for a pumping station will not cause difficulty. When choosing a new product for replacement, you should pay attention to the following parameters:
- conformity of threaded connections;

Article
The pressure switch is a part of the pumping station, which is responsible for starting and stopping the pumping equipment when a certain pressure in the hydraulic tank is reached. As a rule, when buying a pumping station, the factory settings are set on the pressure sensors. As a result, the unit, adjusted by the manufacturer, reacts to certain indicators for starting and stopping the pump. Usually, the factory settings for switching on are set in the range of 1.5-1.8 atm., And the settings for switching off the device are triggered when the pressure hits the range from 2.5 to 3 atm.
But sometimes, for more efficient operation of the station in certain conditions, it is necessary to change the device settings. In this case, the pressure switch of the pumping station is adjusted. From our article you will learn how to do it yourself, and the video at the end of the article will help you more clearly understand the process.
So that you can properly adjust this relay with your own hands, you should understand the features of its design and understand the principle of operation of the unit.
The pressure switch of the pumping station is a metal base, on the upper part of which a contact group, two spring-loaded regulators of different sizes and a terminal block are fixed. In the lower part of the steel plate, a membrane cover is attached, under which there is a steel piston and the membrane itself, as well as a quick-release nut for fixing to an adapter installed on pumping equipment. All these parts are covered with a plastic lid. This, in turn, is attached to the screw part of the large regulator. This cover can be easily removed if necessary using spanner or screwdrivers.
As a rule, relays in water pumping stations can differ in configuration, shape and location of individual elements, but usually they have the same design as we described above. Sometimes the relay can be equipped with additional elements that allow protecting the unit from running dry and protecting the motor from overheating, for this the device will measure the temperature of the pumped liquid.
The principle of operation of this device is as follows:
- Under the action of the pressure of the water coming from the pumping equipment, the membrane, due to the increase in air pressure in the second chamber, presses on the piston, which actuates the contact group.
- This group is mounted on a steel platform equipped with two hinges. Depending on what position it takes, the contacts through which the voltage of 220 V goes to the pump unit can close or open, thereby causing the pump to start or stop.
- To balance the piston pressure, a regulator spring is used to act on the platform to install the contact block. The compression force of the spring is adjusted by means of the corresponding nut.
- As the amount of water in the system decreases due to the consumption by the consumer, the air pressure in the water supply tank drops. As a result, the spring, overcoming the action of the piston, closes the contact group, which leads to the start of the pump.
- As more water becomes in the tank, the air pressure increases. This causes the piston to gradually move the contact platform in spite of the force of the spring. However, the opening of the contacts does not occur immediately, but after the platform has been displaced by a certain distance. This value depends on how much the second small spring will be compressed. It, like the large spring, is located on the stem with a nut. As soon as the contacts open, the pump unit stops working.
From this it turns out that in order to adjust the switching pressure of the water supply unit, it is necessary to correctly adjust the compression force of the large spring. The pressure regulated by this element is also called the lower one. To adjust the upper pressure in the water supply system, it is necessary to adjust the actuation of the small spring. The compression force of this element allows you to set the difference between the cut-off and cut-off pressure.
Setting the pressure switch of the pumping station may be necessary if the owner's factory settings do not settle or they are lost. However, before proceeding with the adjustment, it is necessary to properly prepare the storage tank.
Hydraulic tank preparation

A hydraulic tank, storage tank or hydraulic accumulator is a sealed tank consisting of two parts. In one part, in the form of a rubber bulb, water accumulates. And the other part is the space between the walls of the pear and the inner surface of the hydraulic tank, into which a certain amount of air is pumped.
Since water accumulates in the pear, it is connected to the water supply system. Air can be pumped into the second chamber using a conventional car pump. Thanks to this air, the pear is compressed with water, which helps to maintain a certain pressure in the water supply pipes. Due to this, after opening the tap, the movement of water through the pipeline occurs under pressure without turning on the pump.
Attention: if the air pressure in the hydraulic tank is selected incorrectly, it will not be possible to achieve the optimal operation of the system.
Too high or low value can lead to frequent starting and stopping of the pump, which negatively affects the life of the device. A lower value can lead to excessive stretching of the pear and its rapid failure.
Hydraulic tank preparation sequence:
- Before pumping air into the hydraulic tank or before checking the indicators, it is necessary to drain the water from the pipeline. To do this, open the bottom tap. As a result, the pear in the storage tank will be empty.
- The air injection and pressure test can now be performed. It should be 10 percent less than the bottom figure. If you have not yet configured the system and do not know what the lower value should be, then the adjustment is done as follows:
- if the volume of the hydraulic tank is 20-25 liters, then we set the pressure in the range of 1.4-1.7 bar;
- with the capacity of the storage tank in the range of 50-100 liters, the indicator must be set in the region of 1.7-1.9 bar.
Important: do not leave the accumulator bulb without water for a long time. From this, its walls can dry out or stick together. The air pressure in the hydraulic tank must be checked every month.
Relay setting

With the correct air pressure in the accumulator and clean filters, you can begin to adjust the water relay in the pumping unit. We carry out the adjustment work in the following sequence:
- After turning off the pump, we drain the water from the pipeline. To do this, open the bottom tap in the system. Using a screwdriver or wrench, remove the cover from the relay.
- We turn on the pump that will pump water into the system.
- At the moment of turning off the pump unit, it is necessary to record the readings of the pressure gauge. This will give you the current top pressure.
- After that, it is worth slightly opening the crane, which is located at the highest point of the system. If you have a single-level system, then open the tap farthest from the pump. When the pressure drops to a certain value, the pump unit will start up again. You should take the gauge readings at the time of start-up and write them down again. This will find the current lower pressure. Subtracting the results obtained, you will get the pressure difference for which your relay is tuned. In addition to recording readings, evaluate the head from the open tap (the farthest in the system).
- If the head is insufficient, then the lower pressure must be increased. To do this, the unit must be disconnected from the power supply and tightened the nut on a large spring. If you need to reduce the pressure, then the spring should be weakened.
- Let's move on to adjusting the pressure difference, which you have already learned by subtracting the found indicators. Optimum performance should be within 1.4 atm. If your result is less, then this may give you a more even flow of water, but more frequent starting of the pump. This can lead to premature wear of the unit. If your result exceeds the optimal performance, then the work will take place in a more gentle mode, but the difference between the extremely high and low pressure will become noticeable. To adjust this parameter, you need to turn the nut on the small spring. In order to increase the pressure difference, it is necessary to increase the compression force. Loosening the spring will reverse the action.
- After making the adjustment, it is worth checking its effectiveness. To do this, the water is drained from the system again, the power supply is connected to the pumping equipment and the unit is started. Further steps are repeated until the relay settings suit you.
Attention: the second (small) spring is very sensitive, so its adjustment should be done very carefully, turning the nut a small turn.
Initial setup

If the springs on your relay are completely loose, you will have to re-adjust from scratch. In this case, the work is carried out in the following sequence:
- They start the pumping equipment and pressurize the system to a level when the water pressure from the faucet farthest from the pump does not become more or less acceptable for you. Let us assume that the measuring device showed at this moment a value of 1.5 bar. We turn off the pump.
- Now you need to disconnect the pumping station from the power, open the cover on the relay and start tightening the nut on the large spring until you hear a characteristic click, indicating that the contacts are closed.
- The relay cover is installed in place and the pumping equipment is started. In this case, the pressure must be brought to 2.9 bar.
- Now the unit needs to be disconnected from the power supply again, open the cover on the relay again and tighten the nut of the small spring until you hear a click of the opening of the contacts.
- After the settings have been made, the relay will operate at a lower value of 1.5 bar and turn off the pump at an upper pressure of 2.9 bar. We return the cover on the relay to its place, and connect the station to the mains.
Video instructions for adjusting the pressure switch of the water supply unit with your own hands:
A pressure switch is a small but indispensable component of a large and small pumping station. And if all its other elements just need to be connected correctly, then it will also have to be additionally configured. It is this device that is responsible for automating the pumping process. It turns on and off the equipment according to the pressure in the hydraulic tank.
Competent adjustment of the pressure switch for the pump is a guarantee of comfort and long service life of the equipment. How it is performed, what actions need to be performed and what data to know for fine tuning, we describe in detail in the article. You will find out why and in what situation it is produced.
In addition to the step-by-step description of the adjustment procedure, we provide valuable recommendations provided by hydraulic engineers. To optimize perception, the text is supplemented with photo selections, diagrams, video guides.
Numerous varieties, which are completed with almost all pumping stations, are arranged in approximately the same way.
Inside the plastic case there is a metal base on which the rest of the elements are fixed:
- membrane;
- piston;
- metal platform;
- electrical contact assembly.
Above, under the plastic cover, there are two springs - a large and a small one. When the membrane is under pressure, it pushes the piston.
He, in turn, raises the platform, which acts on the large spring, compressing it. A large spring resists this pressure, limiting the movement of the piston.
The small distance that separates the large and small adjusting springs is enough to regulate the operation of a whole set of devices. The platform, under pressure from the diaphragm, gradually rises until its edge reaches the small spring. The pressure on the platform at this moment increases, as a result of which its position changes.
Image gallery
An increasing number of people are choosing to live in suburban cottages, country houses and new settlements. It has been proven that the urban rhythm exhausts even the strongest person, which directly affects the efficiency of his work and even his relationships with loved ones. Even the government understands this, promoting the One-Storied Russia program. But this is all theory. In practice, it turns out that an ordinary person who decides to equip permanent or temporary housing outside the city limits is faced with a number of nuances that must be taken into account. So, living in a city, it is not at all necessary to understand what a pressure switch of a pumping station is. In rural areas, where, as a rule, there is no centralized water supply system, it is difficult to do without such knowledge.
Where to get water in the cottage
Not everyone country houses are located in the area of operation of centralized water supply lines. On the contrary, there are much fewer "lucky" ones who just need to bring a pipe from the main branch with water into the room and enjoy the benefits, much less than the others. But there is a solution. And there are several of them. The choice, as is often the case, is determined by the final cost of installation and subsequent operation of the system.
The most famous are three options for solving the problem:
With the help of a capacious container on the territory of the farm, into which periodically you need to bring / supply water from somewhere for filling. In fact, it is a compact analogue of a water tower. The barrel itself is installed at a height, so that water flows out of it by gravity, you just have to open the tap. This solution has more disadvantages than advantages.
In the classical way - with the help of a well and a bucket (sometimes with a yoke). The reliability is 100%, but there is no need to talk about convenience. Is it worth reminding that to fill a small bathtub will require 14 walkers to the well with a bucket?
Having assembled a pumping station, which automatically takes water from a well or a well and delivers it to the consumer if necessary. This makes it possible with regard to water supply to organize the usual urban life in a village house. In this article, we will look at exactly this case. We will also explain what a pumping station pressure switch is and point out its role in ensuring the operation of a home water supply system.
Individual water supply
A pumping station is a device designed to pump water from an external source and create and maintain the desired pressure in a domestic water taps system. Structurally, it is a set of components connected in a certain way, each of which performs its own function. For example, the pressure switch of a pumping station controls the amount of pressure, in fact, completely controlling the operation of the entire system. In addition, in the event of malfunctions of this element or its incorrect configuration, the accumulating membrane tank may fail, and this is a significant cost for restoration.

What does the pumping station consist of?
This device includes:
An electric pump pumping water from an external source. Depending on the way the scheme is implemented, it can be submersible, constantly under water, as well as external, surface.
Preventing water from leaving by gravity.
Pressure switch of the pumping station, which regulates the pressure by turning the pump on / off.
A hydroaccumulator tank that stores and dispenses water.
A piping system consisting of auxiliary elements (pipes, five-way union, filter).

Principle of operation
Before we explain how the pressure switch of the pumping station is set up, it is worth at least in general terms to talk about the operation of the individual home water supply system. Inside the accumulator there is a pear-shaped container made of modified food-grade rubber, and air is pumped between it and the tank walls. The pump pumps water into the "pear", it expands and compresses the outer air gap, which begins to exert pressure on the walls. Adjusting the pressure switch of the pumping station allows the owner of the system to set the limit for filling the tank himself and, as a result, the moment the pump is turned off, controlling the value on the pressure gauge.
Water will not go back into the well, as this is prevented by a spring-loaded valve. It is worth opening the tap at any point of the water intake - and water will rush from the pear through the system, and the initial pressure will be equal to the set value. As the water is consumed, the pressure will drop, and upon reaching the lower threshold set in the relay, the pump will turn on and the cycle will repeat.

Correct installation
As we have already indicated, the most important element of such a water supply system is the pressure switch of the pumping station. It is connected between the outlet from the accumulator and the check valve on the pipeline. Although, for the sake of economy, all splitters can be assembled independently from single components, we recommend purchasing a five-way union, which provides threads for all major parts, including a pressure gauge. It is important not to confuse the order of the check valve and the fitting, otherwise the adjustment of the pressure switch of the pumping station will be impossible. By using standard components, this error is minimized.
Pumping station pressure switch device
In the design of stations for individual water supply, RM-5 or its foreign analogue, fully compatible in terms of conclusions, is used as a pressure limit regulator. However, changes are possible in internal structure and, as a consequence, pumping station pressure switch malfunctions are also different, although they can be grouped according to similarity.
Inside each model (RD5 or PM5) there is a metal movable plate (platform), on which two springs exert pressure from opposite sides. Also, the water pumped into the pear indirectly presses on it. By rotating the clamping nut of the corresponding spring block, the response limits can be increased or decreased. Springs seem to "help" (or hinder) the water pressure to displace the plate. The mechanism is designed in such a way that when the platform is displaced, several groups of electrical contacts are closed or opened.

That is, the circuit itself works as follows:
The pump pumps water into the accumulator. Power is supplied to the motor through the closed contacts in the pressure switch.
The water pressure in the tank grows, when a certain value is reached, set by the springs of the upper limit in the RD-5, the mechanism is triggered and the electrical circuit breaks - the pump turns off. The liquid does not go back into the well thanks to the valve.
As the water draws off, the pear is emptied, the pressure in the system drops and the lower limit spring is activated in the relay, closing the contacts to the pump. The cycle repeats itself.
Configuring the RM-5 relay
Outwardly, it is a small plastic box, on the lower side of which there is a metal base with a union nut placed there, the system of which is similar to the "American". With its help, the device is screwed to the output of the five-way fitting. Setting the pressure switch consists in tightening two nuts. The larger one is located on top of the metal plate and is marked with the letter "P". It is responsible for the upper pressure value at which the contacts open and the pump motor is turned off. The smaller nut is referred to as "ΔP" and indirectly indicates the lower value, upon reaching which the electrical circuit is turned on. When making adjustments, it is very important to understand that "Delta P", unlike "P", does not set a lower limit, but regulates the difference between the cut-off and cut-off pressures.

Adjust the upper limit at which the pump turns off
A prerequisite for correct adjustment is to check the air pressure in the accumulator tank. Usually it is about 1.5 atmospheres. The higher it is, the less water the tank will accumulate, but then the average pressure will be higher. Imagine that when the tank is completely empty, there is 1 atm. This is permissible. If less, then you need to use a pump.
After that, power should be applied to the circuit (it is assumed that everything is assembled, and the taps are closed) - the pump will turn on, and water will be pumped into the container. Next, you need to follow the movement of the arrow on the pressure gauge. When a certain value is reached, the relay will work and the engine will turn off. After that, turning nut P slightly, you can reduce or increase the shutdown limit. The arrows next to the label on the plate indicate the direction (+ or -). You should not be too zealous, since each model of the accumulator is designed for its own permissible volume of water, which should not be exceeded. previously measured, it allows you to calculate the volume of accumulated liquid: if the shutdown occurred at 4 atm, and in the air gap 1 atm, then 3 atm (about 30 liters) is drawn into the tank. Of course, there is no full return, so less is available to the owner.
Adjusting the lower limit
After turning off the circuit at the upper limit, open the tap and monitor the pressure gauge. The value at which the pump is turned on is just the lower limit. If it is large, then by rotating the nut "ΔP", you can increase or decrease it. In any case, the remaining pressure should not be lower than 0.9 bar.
Several nuances
An important rule that allows you to extend the operating time of a rubber tank is: the pressure in the air gap should not exceed by more than 10% the lower limit for switching on the pump. Otherwise, it will be possible to get more water and reduce the frequency of starting the engine, however, the bulb will bend in different directions, reducing its resource.
If, when adjusting the upper value, the pump does not turn off, and the pressure gauge needle freezes at some figure, then this means that there is not enough pump power to pump up to the set limits. It is necessary to interrupt the power supply and, slightly reducing the "P", repeat the test, having previously disassembled the accumulated water.
Although it is possible to repair the pressure switch of the pumping station, it is only a temporary remedy. Since this element actually protects the pump from overload, and the pear from damage, it is better to purchase a new relay. The only exception is routine maintenance, in which internal rubbing parts are lubricated to reduce resistance and more accurate response.